
How to Set Up EchoMimic V2 for Stunning AI Avatars Using Gradio and ComfyUI
EchoMimic v2 takes digital interactions innovation to the next level. In this guide, we'll show you how to use the Pinokio installer for Gradio Web UI and ComfyUI custom nodes to streamline the setup process, enabling you to create compelling talking avatars with ease. Be you a developer or a creative enthusiast, this tutorial provides the guidance needed to fully harness EchoMimic v2's potential.
What Is EchoMimic V2?
EchoMimic v2 is a cutting-edge AI tool for generating lifelike talking avatars. Unlike its predecessor, version 2 supports facial expressions and half-body motions, driven by a single image, audio inputs, and hand poses. For customer service, presentations, and creative projects, EchoMimic v2 makes AI avatar animations more accessible than ever.
Set Up EchoMimic V2 With Gradio
Gradio's web-based UI simplifies the installation process for EchoMimic v2. Follow these steps users can made it:
Step 1: Download and Install
Download the Pinokio installer from the official EchoMimic GitHub repository and run the installer to automatically set up the necessary libraries and dependencies.
Step 2: Prepare Your Inputs
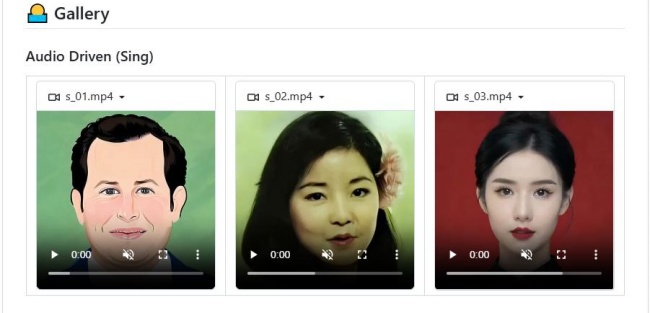
Use high-resolution images with clear facial features and visible hands and ensure the aspect ratio is square (e.g., 1024x1024) for optimal results.
Then, select an audio file that matches your desired animation style.
Step 3: Generate Your Animation
Upload your image and audio file into the Gradio interface then adjust weight, width, and height settings to refine your avatar's appearance. Click "Generate" to produce the animated avatar.
Step 4: Export and Preview
Preview the animation in the control panel and use the "Download" button to save your output video.
Also read: How to Create Professional AI Avatar Videos in Minutes
Use ComfyUI Custom Nodes for Advanced Animations
For those who prefer more customization, ComfyUI's integration with EchoMimic v2 is a game-changer. These are the simple steps:

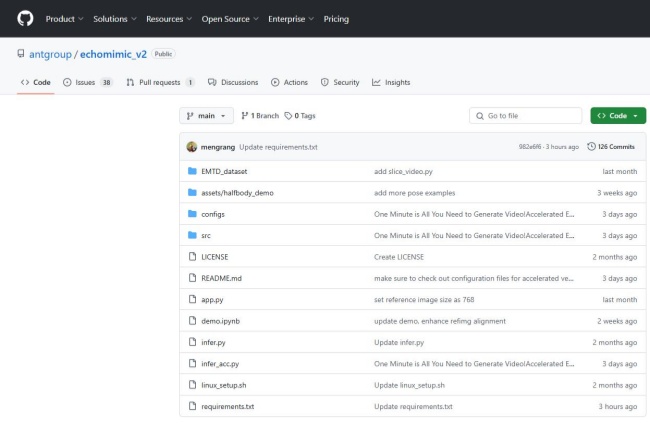
Step 1: Clone the Repository
Add the EchoMimic v2 folder to your ComfyUI custom nodes directory by cloning it from GitHub.
Step 2: Install Dependencies
Run the requirements.txt file to install necessary components. Ensure all models, including Unet, VAE, and audio processors, are stored in the correct directory.
Step 3: Create Custom Workflows
Use ComfyUI's intuitive interface to combine image generation nodes with animation nodes anustomize poses, gestures, and movements to suit your project.
Step 4: Export the Final Output
Generate the animated video combining audio and image inputs and preview and save the output for further use.
Best Practices for Creating AI Avatars
- Choose the Right Inputs: High-quality images and well-matched audio files are crucial for natural animations.
- Optimize Resolutions: Use 512x512 or 1024x1024 resolutions for better stability and clarity.
- Experiment With Poses: Explore different hand and body gestures to enhance the avatar's expressiveness.
- Custom Styles: Personalize your AI avatars by integrating unique character styles through tools like Flux Schnell.
Troubleshooting and Tips
- Installation Errors: If the setup fails, verify the folder structure and dependency installations.
- Flickering Animations: Use higher-resolution models or post-process the output with video enhancement tools.
- Low Animation Quality: Use higher-resolution models or post-process animations with enhancement tools.
- Model Compatibility Issues: Ensure you're using the latest version of EchoMimic and compatible ComfyUI nodes.
Conclusion
EchoMimic v2 is a groundbreaking tool for creating AI avatars with natural animations and expressive movements. Every time you want to use Gradio for a straightforward setup or dive into ComfyUI's advanced customizations, this tutorial equips you with everything needed to animate your characters.
Start your journey with EchoMimic v2 today and bring your AI avatar projects to life!