How to Face Swap in Photoshop: Step-by-Step Guide for Beginners
Have you ever captured the perfect group photo—except for that one friend blinking or making a funny face? Or maybe you want to create a fun, creative image by swapping faces between people. Whatever your reason, learning how to face swap in Photoshop is a valuable skill for both professional photographers and casual users alike.
In this guide, you'll discover not only the essential steps for a natural-looking face swap, but also expert tips to make your edits truly seamless.

Why Face Swap in Photoshop?
Face swapping is more than just a playful edit—it's a skill that can elevate your photography, marketing, or social media content. Whether you're fixing a group shot where someone blinked, making a fun meme, or creating a personalized gift, a good face swap can really bring your images to life. With Photoshop's powerful tools like the Lasso Tool, Layer Masks, and Blend Modes, you have everything you need to replace face smoothly and convincingly.
Ready to see how it's done? Let's jump in and make your face swaps look as natural as possible.
Preparation
- Image Selection
Picking the right pictures is the first thing you need to do for a good face replacement. Both photos should have the same lighting, angle, and facial expression. This helps the faces fit together well. High-resolution pictures are better. They show more detail and make the swap look real. If you use low-resolution pictures, the swap might look blurry or fake.
- Setup in Photoshop
Make sure your computer can run the latest version of Photoshop smoothly, especially when working with large files or multiple layers. Open both images and place each on its own layer—this will make the editing process much easier.
How to Swap Face in Photoshop
Here's a reference tutorial video.
Swap Face with Object Selection Tool
1. Start by opening both images in Photoshop. Place each image on its own layer. Use the Object Selection Tool (or Quick Selection Tool) to draw a box around the face you want to swap. Photoshop will automatically select the face area. For more precise control, you can switch to the Lasso Tool and manually outline the face.
If the selection isn't perfect—such as missing hair or including unwanted background—zoom in and use the "Select and Mask" option to refine the edges. Softening the border with a slight feather helps the new face blend more naturally.
Tip: Make sure you select a little bit of the hair and neck. This helps the new face look more natural after the swap.
2. Copy and Paste the Face
Once you have selected the face, copy it by pressing Ctrl+C (Windows) or Cmd+C (Mac). Go to the target image and paste the face onto a new layer with Ctrl+V or Cmd+V to replace face in picture. The face will appear as a new layer above the original image.
If you notice sharp or unnatural edges, use the "Feather" option before copying to soften them. For color or lighting mismatches, try the Match Color feature or use Dodge and Burn tools to adjust brightness and shadows, making the skin tones more consistent.
3. Align and Resize
With the new face layer selected, lower its opacity so you can see both faces at once. Use the Move Tool to position the new face over the original, and the Transform tool (Ctrl+T or Cmd+T) to resize and rotate as needed for head swap. Carefully align the eyes, nose, and mouth for a natural look.
Take your time with this step—precise alignment is crucial. If the size or angle still doesn’t match, use the Warp tool for subtle adjustments, or consider choosing a different source image for a better fit.
Note: Matching the angle and size is key for a natural look. If the faces do not match, try picking a different photo or use Photoshop's Warp tool for fine adjustments.
Face Swapping with Layer Masks
For a natural-looking face swap, blending is essential. Layer masks in Photoshop let you control which parts of the new face are visible, making the transition seamless. This is especially useful when you want to blend faces smoothly for a more convincing result.
1. Stack Your Images
Open both images in Photoshop. Place the image with the face you want to use as the bottom layer, and the main photo as the top layer.
2. Align the Faces
Select both layers, then go to Edit > Auto-Align Layers to roughly match up the faces. This helps ensure the features line up for a more natural result.
3. Add a Layer Mask
With the top layer selected, add a layer mask. Make sure the mask is fully white (revealing the top image).
4. Reveal the New Face
Select the Brush Tool, set it to black, and use a soft brush. Carefully paint over the face area on the mask. This will "erase" the top face and reveal the face from the bottom layer underneath in real time. Adjust brush size and hardness as needed for a smooth transition.
5. Fine-Tune the Blend
Zoom in and refine the mask edges for a seamless look. You can use the feather slider in the Properties panel or apply a slight Gaussian Blur to the mask for softer blending.
Tip: Take your time with alignment and blending—small tweaks make a big difference in realism.
With these steps, you’ll achieve a convincing face swap that looks smooth and natural.
⭐Try AI Face Swap Tool for One-Click Face Replacement
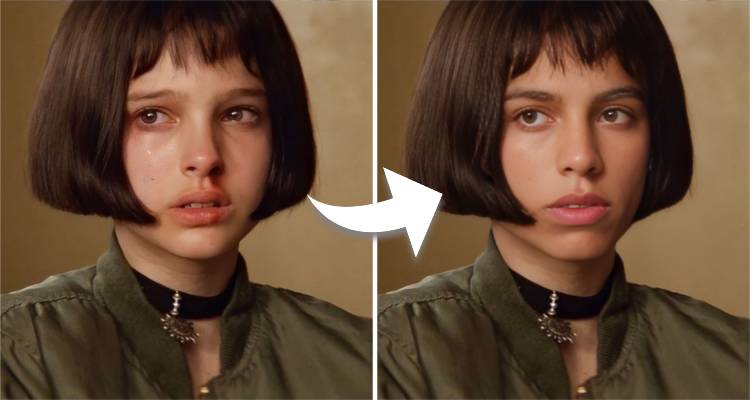
While Photoshop gives you full creative control and professional-level results, sometimes you just want a quick result—maybe for a last-minute social post, a gender swap project, or a fun meme. That's where SeaArt AI Face Swapper comes in.
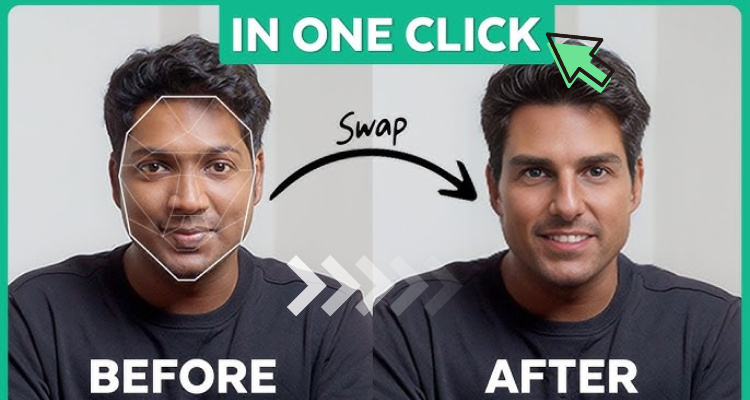
SeaArt's AI-powered face swap tool lets you swap faces in photos and even video face swap or GIF face swap in just a few clicks.
There's no need to master complex software or spend time on manual adjustments. Simply upload your images, select the faces you want to swap, and let the AI do the rest. The process is fast, free, and delivers high-quality, realistic results—perfect for social media, creative projects, or just having fun with friends.
What sets SeaArt apart is its ability to handle multiple faces in group photos, support for video face swaps, and a user-friendly interface that makes the whole experience seamless. Whether you want to create hilarious memes, experiment with cosplay looks, or personalize your content, SeaArt AI Face Swapper opens up endless creative possibilities.
So, if you're looking for a simple and effective alternative to traditional editing, give SeaArt's AI Face Swapper a try and see how easy face swapping can be.
Here's how to swap faces with SeaArt AI:
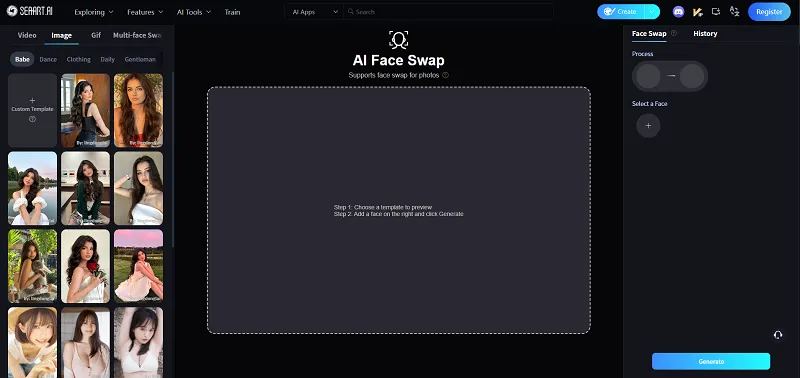
Step 1: Open AI Face Swap Tool
Step 2: Upload Your Media
Upload the photo or video you want to edit as the source media. For the best results, make sure the image or video is clear and well-lit.
Step 3: Select the Face to Swap
Select & upload the image featuring the face you want to replace the original face.
Step 4: Preview & Download
Click to instantly preview the face swap result. If satisfied, download the generated image.
Conclusion
Face swapping doesn't have to be complicated. With Photoshop, you have the flexibility to fine-tune every detail and get creative with your edits. If you're wondering how to face swap in Photoshop, just follow the steps above and you'll be able to achieve seamless, professional-looking results.
But sometimes, you just want a quick result—maybe for a last-minute social post or a fun project with friends. That's where tools like SeaArt's face swap AI tool really shine. Whether you prefer hands-on editing or a one-click solution, you've got great options. Give both a try, and you'll be ready to swap faces like a pro, no matter the occasion!
FAQs
1. How do you make a face swap look natural in Photoshop?
You should match the lighting, angle, and skin tone of both faces. Use layer masks and the Blur tool to blend edges. Adjust colors with Match Color. Take your time to align the features.
2. Is it safe to do an AI face swap online?
SeaArt AI's AI Face Swapper keeps your photos private. You can use it safely for fun or creative projects.
3. Do you need Photoshop skills to swap faces with SeaArt AI?
No skills needed! SeaArt AI's AI Face Swapper works online. You just upload your images and let the AI do the work. You get a face swap in seconds.